
Retopoflow
 Contours
The Contours tool gives you a quick and easy way to retopologize cylindrical forms. For example, it’s ideal for organic forms such as arms, fingers, legs, tentacles, tails, horns, etc.
Inserting
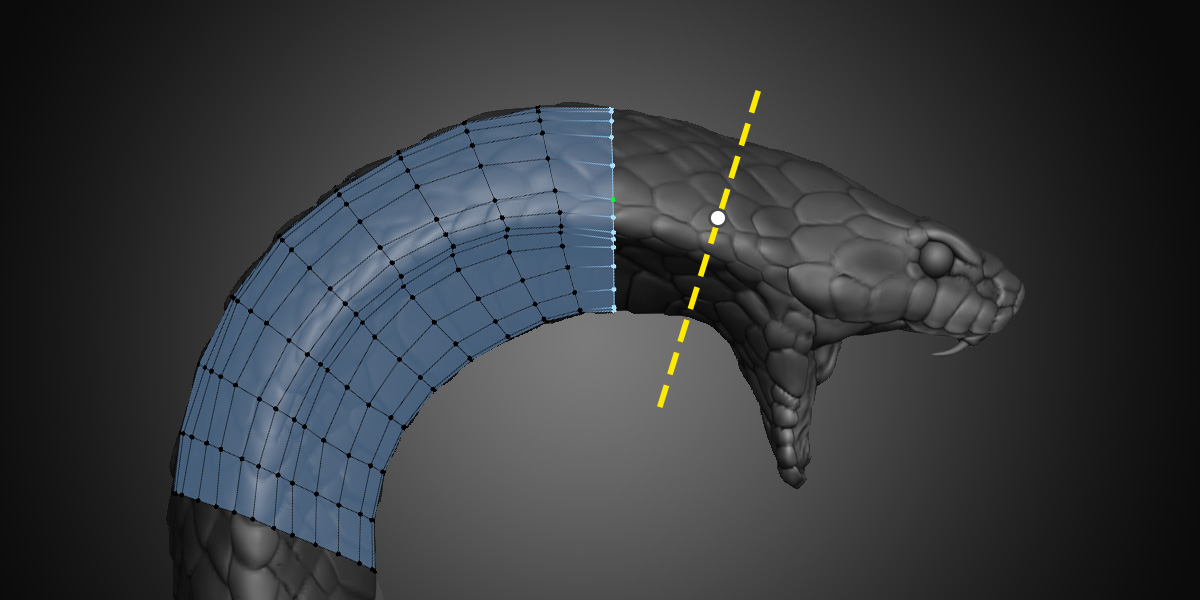
The tool works by drawing strokes perpendicular to the form to create loops that define the contour of the shape.
Hold Ctrl and LMB Drag across the source geometry to cretate a new cut. The source geometry under the center of the stroke is what gets evaluated. You may draw strokes in any order, from any direction.
- If there is no retopology geometry selected or under the stroke, a new loop will be created.
- If the stroke is over existing geometry, a new cut will be inserted similar to a loop cut.
- If there is a loop selected, a new loop will be created and connected to the selection if possible.
After you create a new loop but before that loop is connected to any other geometry (including another loop), you can adjust the number of vertices in the loop by scrolling with Ctrl Mouse Wheel.
Settings
Count is the number of vertices that will be created when adding a new loop that is not connected to any geometry. When extruding or cutting existing geometry, the new loop will have the same number of vertices as the adjacent loops.
Method is how Contours calculates the shape of the source mesh in order to create a new loop around it.
-
Walk calculates the faces under the stroke one by one until it complets a loop, ensuring that the shape is fully preserved. This can be slow on extremely dense meshes, and does not work on non-manifold geometry, but is still quite fast and gives the best results in the vast majority of cases. It works great for complex shapes like fingers, where screen-space or raycasting algorithms tend to fail.
-
Fast and Skip are experimental options that can improve speed, but are currently not always accurate or stable. They are still in development and not guarenteed to work.
Selecting
The default selection mode for Contours is Vertex + Edge because it is helpful to be able to quickly select edges and loops while also clearly seeing the number and position of the newly creted vertices.
General selection options for all tools can be read about on the Retopoflow Mode docs page under Selection.
Transforming
You can quickly slide loops around by simply clicking and dragging on an edge. [Not working yet in version 4]
To rotate or twist a loop around the surface of the source, use the hotkey Alt R. [Not working yet in version 4]