RetopoFlow
A suite of retopology tools for Blender
General Help
Help Shortcut: F1
When RetopoFlow Mode is enabled, certain shortcuts are available regardless of the tool selected.
For tool-specific help, select the tool from the Tools panel, and either press F2 or click Tool Help.
View the table of contents for all built-in documentation by pressing Shift+F1 at any time.
Below is a brief description of some of the features in RetopoFlow. For more details, see the tooltips when hovering or the product documentation page.
RetopoFlow Shortcuts
Tab, Escape |
: | quit RetopoFlow |
Ctrl+S |
: | save blend file (same as Blender’s save) |
F1 |
: | view general help (this document) |
Shift+F1 |
: | view all help documents (table of contents) |
F2 |
: | view help for currently selected tool |
F9 |
: | toggle on/off main RF windows |
Tool Shortcuts
Pressing the tool’s shortcut will automatically switch to that tool. The shortcuts for each tool is a number at top of keyboard (not numpad numbers).
1, Ctrl+Alt+C |
: | Contours | help |
2, Ctrl+Alt+P |
: | PolyStrips | help |
3, Ctrl+Alt+B |
: | Strokes | help |
4, Ctrl+Alt+F |
: | Patches | help |
5, Ctrl+Alt+V |
: | PolyPen | help |
Ctrl+5, Ctrl+K |
: | Knife | help |
6, Ctrl+Alt+Q |
: | Loops | help |
7, Ctrl+Alt+G |
: | Tweak | help |
8, Ctrl+Alt+X |
: | Relax | help |
W |
: | Select | help |
Note: selection and the undo stack is maintained between tools.
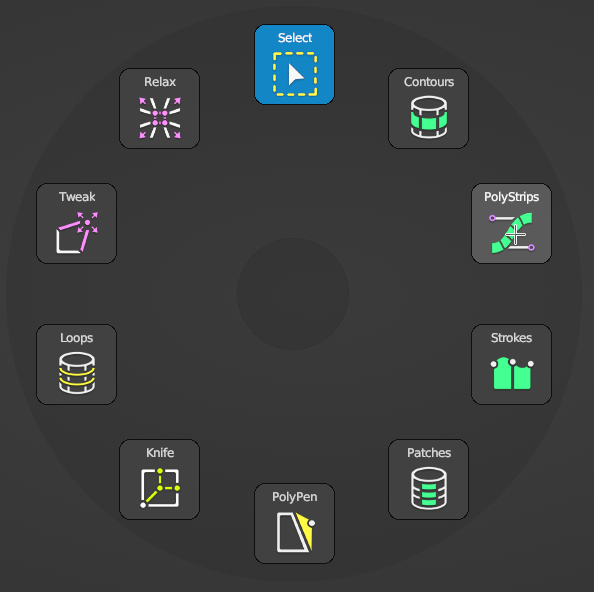
Press `, Q at any time to show the tool pie menu.
Quick Tool Shortcuts
Pressing the tool’s quick shortcut will temporarily switch to that tool. RetopoFlow will switch back to the previously selected tool once you are done.
Ctrl+R |
: | Loops |
K |
: | Knife |
C |
: | Tweak |
Z |
: | Relax |
B |
: | Select |
Universal Shortcuts
The following shortcuts work across all the tools, although each tool may have a distinct way of performing the action.
For example, pressing G in Contours will slide the selected loop.
Ctrl+LMB, Ctrl+LMB+Double |
: | create new geometry with current tool / apply relax or tweak |
LMB+Click, Shift+LMB+Click |
: | select single |
LMB+Drag, Shift+LMB+Drag |
: | selection painting when mouse hovers geometry |
LMB+Drag |
: | box select when mouse does not hover geometry |
LMB+Double, Shift+LMB+Double |
: | smart selection |
Ctrl+Shift+LMB+Click |
: | select along shortest path |
A |
: | select / deselect all |
Alt+A |
: | deselect all |
Ctrl+I |
: | invert selection |
Ctrl+L |
: | select all linked |
L, Shift+L |
: | select / deselect all linked under mouse |
H |
: | hide selected geometry |
Shift+H |
: | hide unselected geometry |
Alt+H |
: | reveal hidden geometry |
LMB+Drag |
: | transform selection when mouse hovers selected geometry |
G |
: | grab and move selected geometry |
R |
: | rotate selected geometry |
S |
: | scale selected geometry |
V |
: | rip selected edge |
Alt+V |
: | rip and fill selected edge |
Shift+S |
: | smooths edge flow of selected geometry |
Backspace, Delete, X |
: | delete / dissolve dialog |
Ctrl+Backspace, Ctrl+Delete, Ctrl+X |
: | delete / dissolve pie menu |
Ctrl+Z |
: | undo |
Shift+Ctrl+Z |
: | redo |
P |
: | pin selected geometry |
Alt+P |
: | unpin selected geometry |
Shift+Alt+P |
: | unpin all pinned geometry |
Ctrl+E |
: | mark selected edges as seam |
Ctrl+Shift+E |
: | unmark selected edges as seam |
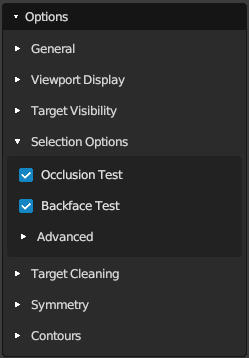
General selection has a few options to help with selecting troublesome vertices (ex: just below surface of source).
When Occlusion Test is enabled, geometry that is occluded by the source(s) are not selectable.
When Backface Test is enabled, geometry that is facing away are not selectable.
Disable these options to make geometry easier to select.
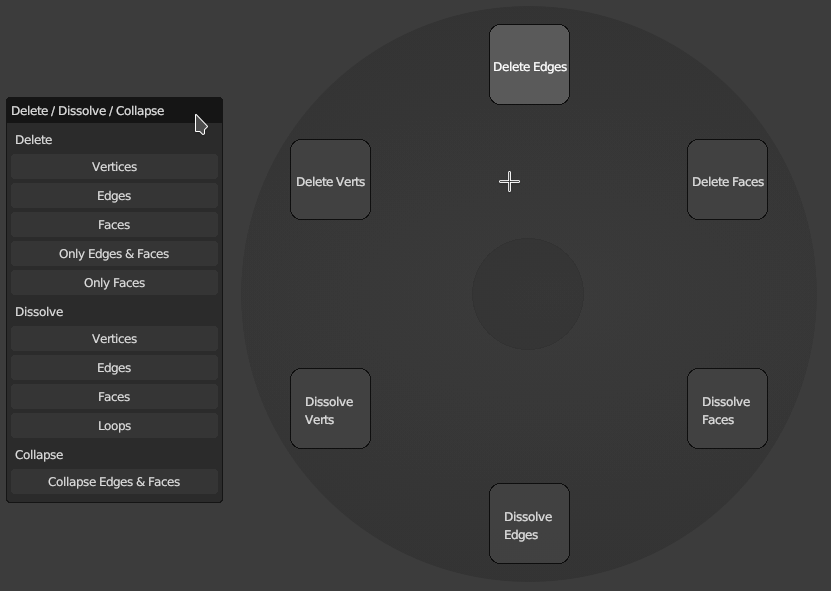
Pressing Backspace, Delete, X will bring up the Delete/Dissolve/Collapse dialog, allowing you to delete/dissolve/collapse the selected geometry.
Pressing and holding Ctrl+Backspace, Ctrl+Delete, Ctrl+X will bring up a Delete/Dissolve pie menu, which has fewer options than the dialog but is generally faster.
General Options
The UI Scale option controls how large or small RetopoFlow will draw things. Larger numbers produce larger fonts, thicker lines, larger vertices, etc.
If the Auto Hide Tool Options is checked, the options for the currently selected tool will be shown, but all other tool options will be hidden.
Target Cleaning
The Snap Verts buttons will snap either All vertices or only Selected vertices to the nearest point on the source meshes.
The Merge by Distance will merge vertices into a single vertex if they are within a given distance.
View Options
The Clipping options control the near and far clipping planes.
The Theme option changes the color of selected geometry.
The Target Drawing options control the rendering of the target mesh. The Above and Below options control transparency of the target mesh. Vertex Size and Edge Size control how large the vertices and how thick the edges are.
Mirror Options
The X, Y, Z checkboxes turn on/off mirroring along the X, Y, Z axes. Note: these options utilize the mirror modifier.
When mirroring is turned on, the mirroring planes can be visualized directly using Plane option, or indirectly by coloring the sources choosing either the Edge or Face option. The Effect setting controls the strength of the visualization.